Pages

.

Showing posts with label Egg-free. Show all posts

AIP Red Sangria & "The Healing Kitchen" review + giveaway

Red Sangria from "The Healing Kitchen"  {AIP, paleo, alcohol free}

It is my pleasure to not only gush about my love of the newest autoimmune protocol (AIP) cookbook The Healing Kitchen and share a recipe for Red Sangria (AIP, Paleo, alcohol-free), but also to be able to giveaway a SIGNED COPY of the book to one of my readers! Full details can be found towards the end of the post.


In January, I spent over a week cooking almost exclusively from the newest AIP cookbook The Healing Kitchen by Alaena Haber (from Grazed and Enthused) and Sarah Ballantyne (from The Paleo Mom). Even though I’m a pretty good cook & enjoy creating my own recipes, there is something really wonderful about making other peoples’ recipes. It is specially when those other people are your friends & you know the recipes will not only be delicious, but nutrient dense & completely autoimmune protocol (AIP) compliant. Whenever I get a new cookbook, I usually sit down & add tags or sticky notes to the recipes I’d like to eventually make. With The Healing Kitchen, I found myself wanting to tag nearly all the recipes! I narrowed my initial “to-make” list down to what I could manage in a week-and-a-half, but I have no doubt that I’ll be making many many more recipes from this amazing cookbook in the future.

Before I show the recipes I personally tried, here are a few general observations about The Healing Kitchen:

  • The recipes are delicious! We loved every recipe I made. Everything was bursting with flavor & nothing was remotely bland, like many people may first believe AIP will be. Pizza. Tacos. Barbecue. Asian cuisine. Alaena & Sarah replicated flavors of traditional favorites into fully AIP compliant variations that I would feel confident serving to even non-AIP/Paleo friends and family. 
  • The recipes are easy. None of the recipes I tried were overly complicated, nor do they require terribly complicated ingredients.  
  • This book is great for people new to AIP and to seasoned veterans who’d like to spice up (haha!) their meals and get out of a food rut.
Dinners from The Healing Kitchen 
AIP Dinners from "The Healing Kitchen"
Taco Night! (Toasted Lime Cilantro Cauli-Rice, Taco Beef, Easy Guacamole) | Date Night Pizza! (Thin Crust Pizzas made into ham & pineapple Pizza & BBQ pizza with slaw, salad greens with Greek Dressing & Red Sangria) | BBQ Feast (pressure cooked BBQ pulled pork, Tangy Carolina BBQ Sauce, Fennel Mandarin Slaw Garlic Roasted Broccoli) | Meat Loaf (Caramelized Onion & Herb Meatloaf, Carrot Pilaf with lemon & Parsley, Roasted Brussels with Bacon & Cinnamon) | Salmon (Bacon-Date Crusted Salmon, Sweet Potato & Kale “Rice” Salad) 

Lunches from The Healing Kitchen 
AIP Lunches from "The Healing Kitchen"
Speedy Shanghai Stir Fry | Raisin & Spice Meatballs with Sweet Potato & kale “Rice” Salad | Pumpkin Chili 

Breakfasts from The Healing Kitchen
AIP Breakfasts from "The Healing Kitchen"
Crispy Salmon Hash | Bacon Herb Biscuit sandwiches with American Breakfast Sausage | Baked Carrot-Banana Bread N’oatmeal | Ollie’s DIY Sunrise Hash 

Treats & Snacks from The Healing Kitchen
AIP Treats & Snacks from "The Healing Kitchen"
Apple Crumble | Pumpkin Roll with Clementine Cream | Lemon Ginger Energy Balls 

Drinks 
Red Sangria from "The Healing Kitchen"  {AIP, paleo, alcohol free}
Red Sangria 

Alaena & Sarah have graciously allowed me to share the recipe for the Red Sangria with you. I’ve made this recipe more than 3 times so far & I foresee making it many more times in the future too. Since I usually drink water (or tea or occasionally green juice), having a mocktail like this one was really a treat, especially in social settings where everyone else is indulging in wine or cocktails or soda.

This “sangria” tastes like the real deal, only it isn’t made with wine that can perpetuate leaky gut. It’s great not just for people avoiding alcohol on AIP, but also for pregnant ladies & those who abstain from alcohol in general. I mixed my sangria mixture with blood orange kombucha. So delicious!

Red Sangria from "The Healing Kitchen"  {AIP, paleo, alcohol free}

Red Sangria
reprinted, with permission, from The Healing Kitchen by Alaena Haber & Sarah Ballantyne 

1 1/2 c pomegranate juice
1 pear, diced
3 strips fresh orange peel
1/2 lemon, sliced thinly
5 whole cloves
1 cinnamon stick
1 (16-oz) bottle unflavored kombucha, chilled
ice, for serving (optional)
  1. Combine all the ingredients except kombucha in a large glass jar or pitcher. Place in the refrigerator to steep for at least 8 hours or overnight. 
  2. Just before serving, remove the cloves & cinnamon stick and stir in the kombucha. Serve over ice, if desired. 

Note from Laura:
  • I substituted blood orange kombucha for the unflavored kombucha because I love blood orange kombucha. 
  • I also added a few orange slices for fun. 

GIVEAWAY! 
In January, I was fortunate to attend a book signing at Book People in Austin, TX for "The Healing Kitchen." Alaena and Sarah graciously gave me a signed giveaway copy of their amazing cookbook to pass along to one of my readers! 

THK Austin Signing: Alaena, Laura, Sarah
Thanks to Charissa (No Cook Paleo) for taking this photo of Alaena, me, & Sarah

To enter, please use the Rafflecopter widget below. This contest is open to both US and international entries, though the winner may receive an unsigned copy if a non-US resident is chosen. The contest will run through Tuesday March 15, 2016. May the odds be ever in your favor! 

a Rafflecopter giveaway


Additional reviews of "The Healing Kitchen"


Full disclosure: I did receive a complementary review copy of this cookbook, as well as a giveaway copy. However, I loved the recipes SO much that I purchased a copy for my parents :) I would never recommend any resource that I didn't stand behind 100%. 

This recipe is included in the Phoenix Helix Paleo AIP Recipe Roundtable #111

This post contains affiliate links. Thanks for supporting "Sweet Treats." 
reade more... Résuméabuiyad

Two-Ingredient Instant Pot Coconut Milk Yogurt (AIP, Paleo, Low FODMAP)

Two-Ingredient Instant Pot Coconut Milk Yogurt (AIP, Paleo, Low FODMAP)

Ah, the amazing Instant Pot  When my slow-cooker/crockpot broke, I switched to “Team Instant Pot" & have not looked back or second guessed my decision. Instead, I’ve wondered how I have survived so long on AIP without this indispensable appliance!

Two-Ingredient Instant Pot Coconut Milk Yogurt (AIP, Paleo, Low FODMAP)

My latest obsession is Instant Pot oconut milk yogurt. My next two posts will utilize coconut yogurt in both a savory & sweet applications, so it only made sense to give coconut milk yogurt it’s own post :)

Two-Ingredient Instant Pot Coconut Milk Yogurt (AIP, Paleo, Low FODMAP)

Homemade coconut milk yogurt is completely different than any other yogurt I’ve ever tasted. I use to occasionally splurge on commercially made coconut milk yogurt, but most brands have some not-so-great additives, and I didn’t really love the flavor or texture. My homemade version has just enough tang without being exceptionally sour & a slight coconut-y essence without being super sweet coconut. The yogurt separates very easily, making it is very easy just scoop off the thickened top portion, almost like sour cream. Or for more of a yogurt “sauce” consistency, vigorously shaking the jar works well.

I did not realize how much I was missing cultured dairy products, like sour cream, creme fraiche, and yogurt, until I began making this completely AIP coconut milk yogurt. I can see a whole world of applications, from sweet uses, to savory uses, to dressings & sauces and so much more!  The possibilities are endless.  

Two-Ingredient Instant Pot Coconut Milk Yogurt (AIP, Paleo, Low FODMAP)

PS, if anyone else is looking for great Instant Pot recipes, check out this round up from Phoenix Helix.

Note on FODMAPs: FODMAPs are confusing things... Certain resources will say that one item is “ok” and other resources will list that item as “avoid.” I am choosing to get my information about FODMAPs from Monash University & their app. Monash is continually updating their information & they are great about listing what quantity of food (both by volume & by weight) keeps it within the low FODMAP guidelines. As always, though, you know your body best. Just because one list says a food is fine, doesn’t always mean your body will be fine with it. Or on the flip side, just because one list says a food is on the avoid list, doesn’t mean your body is automatically going to be bothered by it. Do what makes your body & mind feel the best.

Two-Ingredient Instant Pot Coconut Milk Yogurt (AIP, Paleo, Low FODMAP) 

2 caps Xymogen Probiomax DF Probiotic (or other comparable multi-strain probiotic; this one has 100 billion CFUs)
1 33.8 fl oz carton AROY-D Coconut Cream
2 sterile quart-sized mason jars + sterile lids
  1.  Empty one probiotic cap into each jar. Divide the AROY-D Coconut Cream evenly between the two quart-sized mason jars  Cap the jar with a sterile lids & shake well to combine. Remove the lids.  
  2. Place both jars, without their lids, into the stainless steel insert of an Instant Pot 7-in-1 Pressure Cooker. Seal the top. Set the vent to “sealing” 
  3. Press the “yogurt” button & set the time to 12 hours. 
  4. After 12 hours, remove the jars from the Instant Pot  Refrigerate, uncovered for at least 12 additional hours before consuming. Top with a lids & continue storing in the refrigerator. 
Notes: 
  • The yogurt may separate unto more solid yogurt at the top & what looks like water at the bottom. I mix the two together, producing a more liquid-y yogurt. If you prefer, just take the top layer for a thicker product. 
  • I have not tried this yogurt with any other brand of probiotics, but I believe other mulit strain protiotics should work. 
  • I do not recommend using a soil-based probiotic like Prescript-Assist for this application. 
  • I have not tried any other brand of coconut cream other than AROY-D Coconut Cream  nor have I substituted coconut milk instead of cream.  
This post contains affiliate links. Thanks for supporting Sweet Treats. 
reade more... Résuméabuiyad

Arnold Palmer Gummies (AIP, Low FODMAP, Paleo)

Arnold Palmer Gummies (AIP, Low FODMAP, Paleo)

This weekend--Labor Day weekend in the US--might signal the unofficial end of summer, but the flavors of summer can continue year round with these Arnold Palmer-inspired gummies. 

Arnold Palmer Gummies (AIP, Low FODMAP, Paleo)

While lemonade & sweet tea can be consumed any time of the year, I find myself indulging in them more in the summer time than in the winter. Of course my methods for making said lemonade & tea have changed pretty drastically since I went AIP/Paleo--I’ve taught myself to drink “lemonade” with just filtered water + a generous splash of lemon juice, no sweetener, including the “allowed” ones like maple syrup and honey (high FODMAP alert). But when it comes to gummies, a little bit of sweetness is necessary to counteract the slight gelatin flavor. 

Arnold Palmer Gummies (AIP, Low FODMAP, Paleo)

I’ve been very intentional in my gelatin & collagen consumption since going low FODMAP in July to combat my stubborn case of SIBO. Collagen goes in my tea every morning. There’s almost always a batch of gelatin-rich gummies in the refrigerator, like my various test batches of this Arnold Palmer-inspired recipe. Barely sweetened panna cotta with low FODMAP berries (strawberries, raspberries, blueberries) is a regular occurrence.

Arnold Palmer Gummies (AIP, Low FODMAP, Paleo)

 While it is sort of difficult to report on how the gelatin/collagen is improving my digestive system & helping to heal my gut, I can most definitely notice an improvement in my skin, hair, & nails. Plus, a couple weeks ago, my new holistic dentist’s ultrasound scan of my jaw revealed some pretty extreme jaw cavitations (i.e. holes in my jaw) leftover from when I had my wisdom teeth extracted over a decade ago (I’ve posted more about this over on Instagram). I’m hoping that the gelatin/collagen will also aid in my (and my dentist’s) goals of stimulating my body to re-grow that bone & heal itself. When healing tastes as great as these gummies, I’ll totally take it ;)

Arnold Palmer Gummies

For the Tea...
1 large sachet of Rishi Tea Summer Lemon blend (each bag weighs around 8 g)
16 fl oz / 2 c Filtered Water
  1. Bring the water to a boil over high heat. Place the tea sachet into a large liquid measuring cup. 
  2. Pour the boiling water over the tea sachet & allow to steep for 8 hours, first by cooling to room temperature & then placing the measuring cup in to the refrigerator. 

Note: if you can’t find Rishi Lemon Ice Tea blend, peel a couple thin strips of peel only (no white pith) from a washed lemon & steep it with a couple black tea sachets & the hot water. 

For the gummies 
1 3/4 c Steeped Tea (see above) 
28 g / 4 Tbl Pasture-Raised Gelatin (NOT collagen--collagen will not gel!) 
a few drops of organic lemon essential oil, optional, or a couple strips of lemon peel (no pith) 
  1. Mix the tea & lemon juice in a medium sauce pan. Whisk in the maple syrup. Sprinkle the gelatin over the liquid & allow to bloom for 5 minutes.
  2. Heat the pan over medium heat, whisking gently, until the gelatin completely melts. 
  3. Remove from the heat & add the optional lemon oil, if desired. 
  4. Pour the liquid into silicone molds (I used this silicone mold or into a large baking dish. (I usually transfer the mixture to a liquid measuring cup for ease of pouring). 
  5. Refrigerate the molds for 2 hours, or until set. Gently pop the gummies out of the mold or cut them into squares.
  6. Store the gummies in the refrigerator. 


This post contains affiliate links. Thanks for supporting Sweet Treats. 

reade more... Résuméabuiyad

Refrigerator Pickles (AIP, Low FODMAP, Paleo, Whole 30)

Refrigerator Pickles (AIP, Low FODMAP, Paleo, Whole 30)

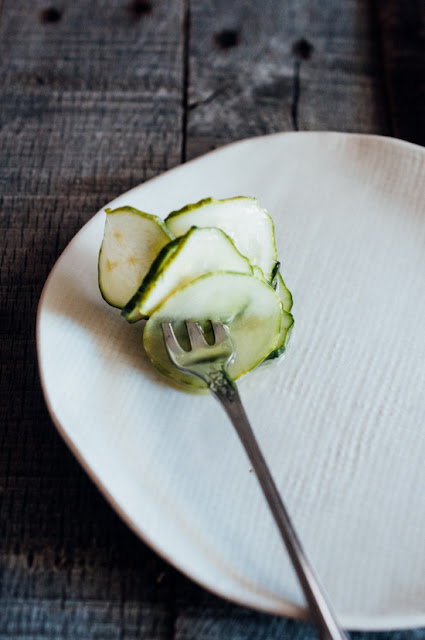
Dill pickles have been one of my favorite foods since I was a small child. Finding commercially made pickles that fit within AIP guidelines (i.e no nightshades, or sugar/corn syrup, or questionable vinegars etc.) was a challenge; however, finding low FODMAP pickles in a store is pretty much impossible. 

Refrigerator Pickles (AIP, Low FODMAP, Paleo, Whole 30)

Refrigerator Pickles (AIP, Low FODMAP, Paleo, Whole 30)

As I navigate this unique health journey, I continually come back to the quote “Necessity is the mother of invention.” Thankfully, pre-low FODMAP, I had found a recipe from Charlotte, a fellow AIP blogger over at “It’s me, Charlotte,” for refrigerator pickles that were totally AIP & super easy to make.

Refrigerator Pickles (AIP, Low FODMAP, Paleo, Whole 30)

Refrigerator Pickles (AIP, Low FODMAP, Paleo, Whole 30)

I have made Charlotte’s original recipe a number of times, however her pickles do rely on delicious, delicious garlic cloves to flavor the brine/pickles. Once I went low FODMAP back in July, I knew I wanted to continue making pickles, but doing so would require a garlic clove substitution. Enter one of my current favorite pantry ingredients: garlic-infused olive oil. FODMAPs are NOT oil soluble, meaning that a garlic infused oil will not contain any FODMAPs, but will have some of that garlic flavor that I’ve been unable to replicate with any other ingredient.

Refrigerator Pickles (AIP, Low FODMAP, Paleo, Whole 30)

As with many AIP / Low FODMAP recipes, I didn’t know how my substitutions would work until I tried it.... Mixing garlic oil & vinegar is a bit like making salad dressing, but it actually works in this situation! I still prefer Charlotte’s original recipe, but this low FODMAP version allows me to continue eating a variation on one of my favorite foods. That, most definitely, is a win in my opinion.

Refrigerator Pickles (AIP, Low FODMAP, Paleo, Whole 30)

Low FODMAP refrigerator pickles
yield’s 1 Half Pint Canning Jar | Inspired by “It’s Me, Charlotte”

1/2 tsp + 1/4 tsp Sea Salt (I use Real Salt Kosher Salt)
3 generous sprigs Fresh Dill
1 Kirby Cucumber, if possible, otherwise english/persian cucumber can work too
1 1/2 tsp Garlic-infused Olive Oil (Trader Joe's Garlic Flavored Olive Oil is my preference), divided into 1/2 tsp amounts
White Wine Vinegar
Filtered Water

  1. Wash & very thinly slice the cucumber. I prefer to carefully use my small mandolin (similar to this one  set to the middle thickness, but you can also use a knife. The thinner the slices are, the better the brine can flavor the cucumber. Discard the ends of the cucumbers, as they can disrupt the pickling process. 
  2. Add 1/2 tsp salt to the bottom of half pint canning jar . Top with a sprig of dill. 
  3. Fill the jar approximately 1/3 of the way with cucumber slices. Drizzle over 1/2 tsp garlic oil. Add more dill. Repeat the process twice more until the jar is full of cucumber slices--there should be three cucumber layers at that point. 
  4. Top off the cucumber slices with 1/4 tsp sea salt, fresh dill & the remaining 1/2 tsp of garlic oil.
  5. Fill the jar 2/3 to 3/4 full of white wine vinegar, depending on how sour you prefer your pickles. Fill the remainder of the jar with filtered water.
  6. Screw on the lid (I prefer the plastic storage caps for vinegar-y things like pickles, salad dressings & bbq sauces) & give it a couple gentle shakes. Let rest in the refrigerator over night before tasting. 
  7. Jar will keep in the refrigerator for several weeks. Note that the garlic oil does solidify a bit in the refrigerator, which is completely normal. 


This post contains affiliate links. Thanks for supporting Sweet Treats. 

reade more... Résuméabuiyad